Ten Weekend DIY Projects to Instantly Transform Your Home
DIY
11/13/20259 min read
If you're looking to give your home a fresh look without a big time or money commitment, weekend DIY projects are the way to go. With just a few simple tools and materials, you can transform your space in two days or less, making a noticeable impact on your home's style and functionality.
These projects are designed to be easy and manageable, even if you don’t have much experience. Whether you want to boost curb appeal, refresh a room, or organize clutter, you'll find practical ideas that fit your schedule and budget.
What Makes Weekend DIY Projects So Effective?
Weekend DIY projects stand out because they offer quick changes that feel rewarding, fit within your budget, and cause little interruption to your daily routine. These projects let you improve your home's look and function without committing to long, costly renovations.
Instant Results and Personal Satisfaction
When you tackle weekend projects, the payoff is immediate. You can paint a room, install shelves, or create an accent wall and see the transformation by Sunday evening. This instant sense of accomplishment motivates you to keep improving your space.
Completing a DIY home improvement project quickly also boosts your confidence. You get to physically see how your effort enhances your living area, making it a satisfying and tangible achievement. That feeling often encourages you to take on more projects, turning your home upgrade ambitions into reality.
Cost-Effective Home Upgrades
Weekend projects are budget-friendly ways to refresh your home without expensive contractors. You only need basic tools and materials, many of which you might already have. Painting doors, organizing storage, or planting a garden are simple yet impactful upgrades that won’t strain your wallet.
Because these projects are designed to be small and fast, you avoid the high labor costs or prolonged disruptions that come with major renovations. This makes weekend DIY ideal if you're looking to boost your home's value and appeal affordably while sticking to your financial goals.
Minimal Disruption and Family Involvement
Since weekend DIY projects are short and focused, they fit nicely around your workweek without creating chaos. You won’t have to dodge phone calls, emails, or deadlines as you do during weekday projects. This means less stress and better quality results.
What’s more, these projects often invite family participation. Whether it’s painting, organizing, or assembling, involving others turns improvement tasks into shared experiences. It’s a fun way to bond while enhancing your home, making your weekend productive and enjoyable.
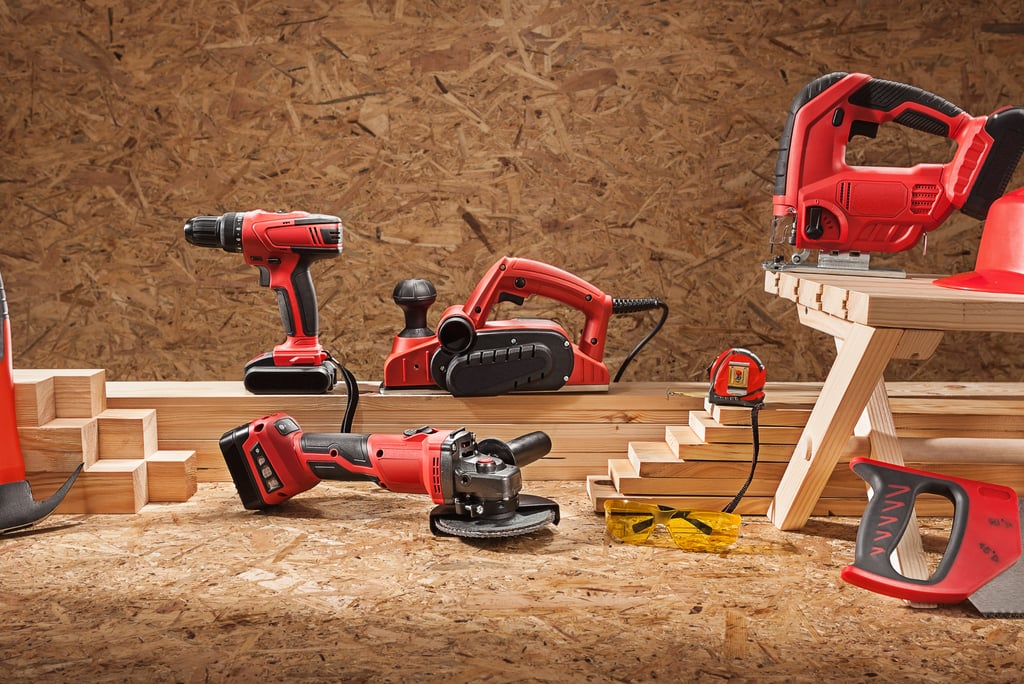
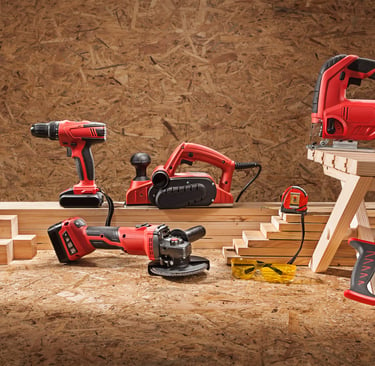
Essential Tools and Materials for DIY Success
Getting the right tools and materials sets you up for smooth and efficient weekend projects. Having what you need at hand helps avoid interruptions and keeps your focus on transforming your space. This includes reliable hand and power tools, proper safety gear, and a well-prepared materials checklist.
Must-Have Hand and Power Tools
Start with a basic toolkit that covers a wide range of tasks. A hammer, screwdriver set (including Phillips and flathead), and a tape measure are essential for measuring, assembling, and fixing. Add a level to ensure your projects are straight and balanced.
For power tools, a cordless drill with various drill bits speeds up drilling and screwing tasks. A jigsaw or circular saw lets you make clean cuts on wood or drywall quickly. If you plan to paint or sand, a sander is very helpful.
Keep your tools organized so you can find them fast. Investing in quality basics means your tools will last longer and perform better during projects.
Safety Gear Every DIYer Needs
Your safety matters just as much as your project’s success. Equip yourself with protective gear before you start any work. At minimum, wear safety goggles to shield your eyes from dust and debris.
Use work gloves to protect your hands from splinters, cuts, and chemicals. Depending on the project, a dust mask or respirator prevents inhaling harmful particles, especially when sanding or painting.
Don’t forget ear protection, like earplugs or ear muffs, for loud power tool use. Wearing sturdy, closed-toe shoes keeps your feet safe from dropped tools or materials.
Materials Checklist for Quick Home Projects
Prepare a materials list to avoid last-minute runs to the hardware store. Common supplies include paint, primer, painter’s tape, and brushes or rollers if you plan to freshen up a room.
For small carpentry projects, stock up on wood screws, nails, sandpaper, and wood filler to smooth rough spots. You might also need adhesives like wood glue or construction adhesive for strong bonds.
Organizing your materials by project helps you track what you have and what you still need. A clear checklist streamlines the process, making your weekend DIY efforts more effective and enjoyable.
For additional ideas on tools and materials, check out this detailed DIY checklist.

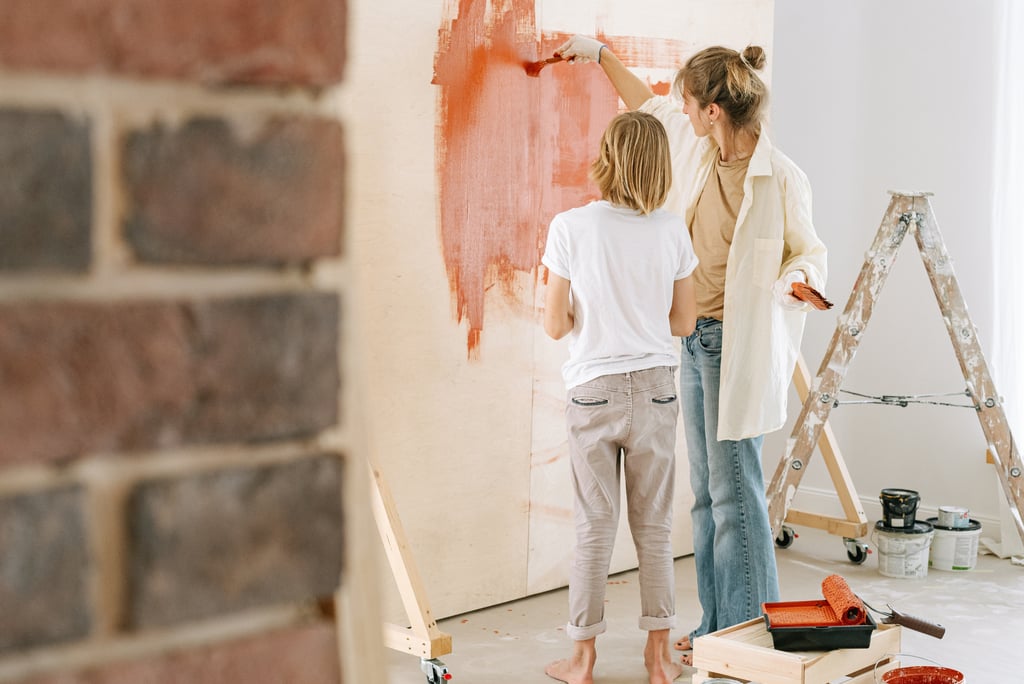
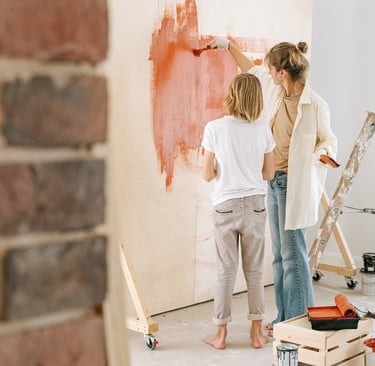
Transform Your Walls: Accent Walls and More
Changing your walls can create a fresh focal point in any room without a full renovation. Whether you’re adding a bold splash of color or applying easy peel-and-stick wallpaper, these updates fit well into weekend DIY home projects and can dramatically change your space.
How to Paint an Accent Wall for Maximum Impact
Start by choosing the right wall—typically one that naturally draws the eye, like behind a sofa or bed. Pick a color that complements your existing palette but stands out enough to create a statement. Use painter’s tape to protect edges and lay down drop cloths to keep your floors clean.
Prep the wall by cleaning and patching any holes. Then, apply a primer if switching from a dark to a light color or on bare drywall. Use a roller for larger areas, and a brush for corners and edges. Two coats usually provide full coverage. Let the paint dry thoroughly between coats.
For extra impact, consider a crisp finish like satin or semi-gloss, which reflects light and adds subtle texture. A painted accent wall refreshes your room quickly and costs little, making it a go-to for many DIY home projects.

Using Peel-and-Stick Wallpaper for a Fresh Look
Peel-and-stick wallpaper is a user-friendly way to transform your walls without the mess of traditional wallpaper paste. It’s ideal if you want to add patterns, textures, or even faux finishes like brick or wood without professional help.
To start, clean and smooth the wall surface thoroughly to ensure strong adhesion. Measure your wall and cut the wallpaper into manageable strips. Peel the backing off gradually as you align and apply the wallpaper, smoothing out air bubbles with a squeegee or cloth.
This material is removable, perfect for renters or if you like to change things up often. Patterns range from geometric designs to botanical prints, allowing you to personalize your space quickly. Peel-and-stick wallpaper combines ease with style, making it one of the best weekend DIY accent wall options you can try.
For more ideas, check out easy DIY accent wall projects you can do in a weekend.

Upgrade Your Lighting for Immediate Style
Changing your lighting can profoundly refresh your home’s look and feel in just a weekend. By carefully selecting new fixtures, adding smart under-cabinet lights, or installing eye-catching chandeliers and pendants, you’ll not only brighten your space but also enhance its style and function.
Choosing and Installing New Light Fixtures
Start by assessing your current lighting fixtures and the mood you want to create. Swap outdated bulbs and fixtures for energy-efficient LEDs and styles that fit your room’s vibe—think modern, rustic, or minimalist. Installing new lighting fixtures is often straightforward if you follow safety guidelines and turn off power before you begin.
Use a sturdy ladder and basic tools like screwdrivers and wire strippers. Match the fixture’s wattage recommendations to avoid overheating. In rooms where you want softer light, opt for dimmable fixtures or bulbs. Changing fixture styles, such as replacing a flush mount with a semi-flush or track lighting, instantly updates your space without a major renovation.

Adding Under-Cabinet Lighting
Under-cabinet lighting is a practical upgrade that improves both aesthetics and functionality, especially in kitchens or workspaces. These lights provide focused illumination, making cooking, reading recipes, or crafts easier. You can choose from LED strip lights, puck lights, or tape lights depending on your cabinet layout and brightness needs.
Installation often requires minimal wiring if you use battery-operated or plug-in models, which are perfect for renters or quick setups. Stick-on options with adhesive backing simplify the process. Position the lights toward the cabinet’s front edge for even, shadow-free illumination. You’ll find that under-cabinet lighting not only lights up surfaces but also adds a subtle, stylish accent to your kitchen’s ambiance.

Statement Chandeliers and Pendant Lights
If you want a bold centerpiece, statement chandeliers and pendant lights can transform dining rooms, foyers, or living spaces instantly. Choose fixtures that complement your décor—crystal or metal chandeliers for elegance, or industrial-style pendants for a modern flair.
When hanging a chandelier, ensure it’s proportionate to the room size and height. Typically, chandeliers should hang about 30 to 36 inches above a dining table. Pendant lights arranged in a series can provide balanced lighting over kitchen islands or counters. Beyond beauty, these fixtures serve as focal points that tie together your room’s design while updating the lighting scheme with style and personality.
Explore more about updating lighting fixtures for immediate impact in your home by checking 10 Weekend DIY Projects That Instantly Upgrade Your Home.

Create Stunning Storage and Displays
Maximize your space by adding stylish storage and eye-catching displays. These projects help organize your home while showing off your personality. You’ll get practical solutions that also enhance your decor.
Building and Installing Floating Shelves
Floating shelves are a sleek way to add storage without bulky furniture. You can build them using wood planks and sturdy brackets or find simple DIY kits. Start by measuring your wall space to determine the right shelf length and depth.
When installing, locate studs with a stud finder to secure the shelves firmly, keeping your items safe. Use a level to ensure they sit straight. Floating shelves work well in kitchens, living rooms, or bathrooms for storing books, plants, or daily essentials—all while freeing up floor space.
With a bit of sanding and painting, you can customize the shelves to match your style and color scheme. This quick upgrade makes any room feel more open and organized.

Arranging a Gallery Wall for Personal Touch
Creating a gallery wall is a great way to personalize your home with your favorite photos and artwork. Begin by selecting frames in various sizes but with a consistent color or style for cohesion. Lay them out on the floor first to experiment with the arrangement.
Plan for balance by mixing different shapes and orientations. Use picture hanging strips or nails to attach your pieces, starting at eye level. Space frames evenly, about 2-3 inches apart, for a clean look.
A gallery wall adds character and tells your story visually. It’s also easy to update by swapping out artwork or photos, keeping your space fresh without much effort. This display technique combines storage and style elegantly, turning empty wall space into a focal point.
Explore more ideas on making stylish, budget-friendly storage with floating shelves and personalized displays at DIY Storage Projects You Can Do in a Weekend.

Refresh Your Kitchen and Bathroom Instantly
You can give your kitchen and bathroom a fresh, modern feel quickly and affordably. Focusing on small upgrades like backsplashes and cabinet hardware lets you create a noticeable change without a full remodel. These projects fit well into a weekend and often require minimal tools or experience.
Installing a Peel-and-Stick Backsplash
A peel-and-stick backsplash is one of the easiest ways to add color and texture to your kitchen or bathroom walls. These backsplashes come with adhesive backing, so you simply measure, peel off the protective layer, and press them onto a clean, smooth surface.
Because they’re lightweight and easy to cut, you can fit them around outlets and corners without professional help. Plus, many options mimic materials like stone, tile, or metal, giving you a high-end look with minimal effort.
Peel-and-stick backsplashes are water-resistant, which makes them suitable for kitchens and bathrooms. They’re also easy to remove or replace if you want to update your style later without damage.

Using Subway and Peel-and-Stick Tiles
Subway tiles are a timeless choice that instantly modernizes any space. If you want the classic look without the hassle, peel-and-stick subway tiles combine style with convenience.
These tiles can be applied directly over existing surfaces, letting you skip messy grouting or tile adhesive. Their smooth finish is durable and easy to clean, ideal for backsplash areas.
You can arrange these tiles in traditional brick patterns or creative layouts, depending on your style. Many peel-and-stick tile kits come with pre-cut, uniform pieces for a neat finish every time.

Replacing Cabinet Hardware for a Modern Look
Updating your cabinet hardware is a simple project that delivers a big visual impact. Swapping out old cabinet knobs and handles instantly freshens both kitchens and bathrooms.
Choose hardware that complements your current style, whether it’s sleek brushed nickel, matte black, or vintage brass. Focus on consistent finishes for a cohesive look.
To replace, remove existing knobs and handles with a screwdriver, then attach the new ones using the original screw holes. This makes it easy and quick, even if you’re not handy.
Updating cabinet hardware can make your cabinets feel new without the expense or mess of a full refinish or replacement.
For ideas on similar projects that rejuvenate your space affordably, check out affordable weekend DIY upgrades.

Painting the Front Door for a Welcoming Entry
A fresh coat of paint on your front door can completely change the look of your home’s entrance. Choose a color that contrasts with your siding and complements your overall style. Bold colors like red, navy, or emerald green stand out and make your entry feel inviting.
Before painting, clean and sand the door to ensure the paint sticks well. Use exterior-grade paint for durability against weather. Don’t forget to update or polish hardware like handles and knockers to complete the look. Painting your front door is a quick, inexpensive way to make a strong first impression.
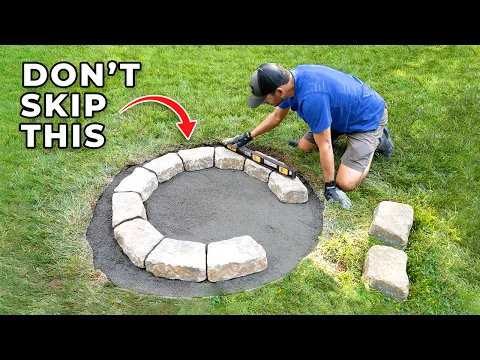
Building a Backyard Fire Pit
A fire pit is a fantastic way to extend your outdoor living space and create a cozy gathering spot. You can build a simple stone or brick fire pit in a weekend with minimal tools. Choose a level area in your yard, away from trees and structures, and consider a design approved by your local regulations.
Gather materials like fire bricks, gravel, and sand. Stack bricks in a circular pattern and fill the base with gravel for drainage. Add seating around the fire pit using logs, benches, or chairs. A fire pit adds both ambiance and function, perfect for cool evenings or entertaining guests.
Creative Ideas for Outdoor Upgrades
Adding lighting, planters, or a new mailbox can refresh your outdoor space with little effort. Solar pathway lights highlight walkways and improve safety without wiring hassles. Decorative planters filled with seasonal flowers bring color and charm to entryways or patios.
Consider updating features like shutters, house numbers, and mailbox styles. These details enhance curb appeal without costly renovations. Even small changes, like pressure washing your porch or trimming overgrown bushes, contribute to a polished and welcoming look.
For more project ideas, check out easy DIY curb appeal projects.